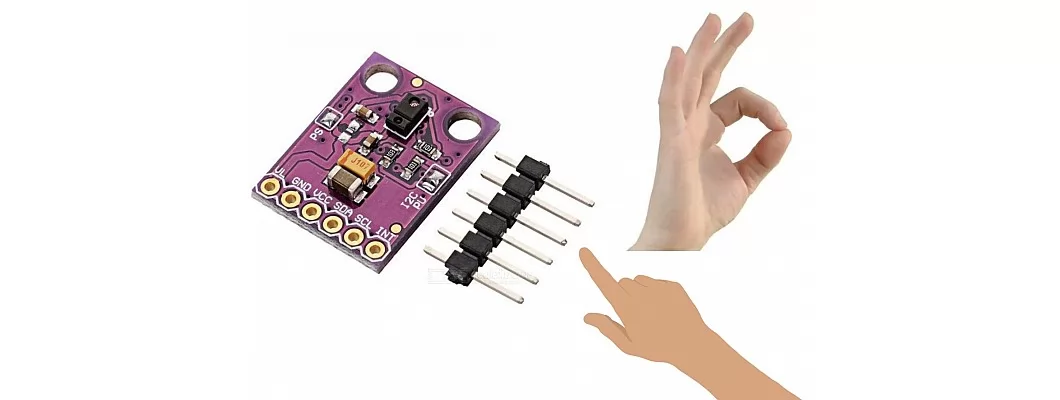
Interfacing Gesture Sensor with Arduino: A Step-by-Step Guide

Introduction
In the realm of interactive electronics projects, gesture recognition plays a significant role in enabling intuitive and engaging user interfaces. By incorporating gesture sensors with Arduino, a popular open-source hardware and software platform, you can bring your creations to life with the power of hand movements. In this comprehensive guide, we will explore the step-by-step process of interfacing a gesture sensor with Arduino, enabling you to unlock the potential of gesture recognition in your own projects.
Understanding Gesture Sensors and Arduino
Gesture Sensors
Gesture sensors are electronic devices designed to detect and interpret hand movements. They utilize a combination of technologies such as infrared (IR) sensors, proximity sensors, and image processing algorithms to analyze the position, motion, and orientation of hands or fingers. These sensors are commonly used in a wide range of applications, including robotics, gaming, home automation, and virtual reality.
Arduino
Arduino is a versatile platform that empowers creators to prototype and develop interactive electronic projects. It consists of both hardware (Arduino boards) and software (Arduino IDE) components. Arduino boards are equipped with microcontrollers, which serve as the brains of the projects. The Arduino IDE provides a user-friendly programming environment to write and upload code to the boards.
Components Required
Before diving into the interfacing process, gather the following components:
- Arduino board (e.g., Arduino Uno)
- Gesture sensor module (e.g., APDS-9960)
- Jumper wires
- Breadboard
- USB cable for Arduino board
Setting Up the Gesture Sensor
To get started, follow these steps to set up the gesture sensor:
- Connect the VCC pin of the gesture sensor module to the 3.3V pin on the Arduino board.
- Connect the GND pin of the gesture sensor module to the GND pin on the Arduino board.
- Connect the SDA pin of the gesture sensor module to the SDA pin on the Arduino board.
- Connect the SCL pin of the gesture sensor module to the SCL pin on the Arduino board.
Interfacing Gesture Sensor with Arduino
Now that the hardware setup is complete, let's interface the gesture sensor with Arduino:
- Open the Arduino IDE on your computer.
- Connect your Arduino board to the computer using a USB cable.
- Create a new Arduino sketch.
- To communicate with the gesture sensor module, include the necessary libraries. These libraries provide functions and methods to interact with the sensor.
- Declare the necessary variables and objects to interface with the gesture sensor module.
- Initialize the gesture sensor module by calling the appropriate initialization function.
- Set up the Arduino board to establish communication with the gesture sensor module by configuring the I2C interface.
- Implement the code for gesture recognition using the provided functions and methods. This code will read data from the gesture sensor and interpret the gestures.
- Upload the code to the Arduino board by clicking on the "Upload" button in the Arduino IDE.
- After the code is successfully uploaded, open the serial monitor to observe the gesture outputs.
Writing Code for Gesture Recognition
Implementing gesture recognition requires writing code that reads data from the gesture sensor and processes it. The specific code will depend on the gesture sensor module you are using, as different modules may have different libraries or example code available. Here are the key steps involved in writing code for gesture recognition:
Initialize the gesture sensor module: This step ensures that the sensor is correctly initialized and ready to capture hand movements.
Read gesture data: Use the appropriate functions or methods to read gesture data from the sensor. This data typically includes information about hand position, motion, and orientation.
Interpret the gestures: Analyze the data and interpret the detected gestures based on predefined patterns or conditions. For example, you might define certain hand movements as swipe gestures or specific gestures for controlling a robot or game.
Testing and Troubleshooting
Once the code is uploaded and running on the Arduino board, it's time to test the gesture recognition functionality. Perform different hand gestures in front of the gesture sensor and observe the output on the serial monitor. If the gestures are not being recognized correctly, here are some troubleshooting steps to consider:
- Check the connections: Ensure that all the connections between the gesture sensor module and the Arduino board are secure and correctly wired.
- Verify the code: Double-check the code implementation, ensuring that you have correctly implemented the functions and methods for gesture recognition.
- Review the sensor documentation: Consult the datasheet or documentation of the gesture sensor module for any specific troubleshooting guidance or known issues.
- Adjust sensitivity settings: Some gesture sensor modules allow adjusting sensitivity settings. Experiment with different sensitivity levels to achieve optimal gesture recognition.
Conclusion
Interfacing a gesture sensor with Arduino opens up a world of possibilities for interactive projects. By leveraging the power of hand movements, you can create innovative and engaging user interfaces for your robotics, gaming, or home automation projects. In this blog post, we explored the step-by-step process of connecting and configuring a gesture sensor with Arduino, writing code for gesture recognition, and troubleshooting common issues.
Now that you have the knowledge to interface gesture sensors with Arduino, the possibilities are endless. Incorporate gesture recognition into your projects and create captivating experiences that respond to intuitive hand movements. Let your imagination run wild and embark on an exciting journey into the realm of gesture-based interaction with Arduino!
Leave a Comment