DIY Home Automation with Arduino: The Ultimate Guide

Home automation has become increasingly popular in recent years due to the convenience and benefits it offers. From controlling lighting and temperature to home security and entertainment systems, home automation allows homeowners to have greater control over their homes. One popular platform for DIY home automation is Arduino, a microcontroller that is affordable, flexible, and open-source.
Understanding Home Automation
Home automation is the use of technology to automate tasks and control different aspects of a home, such as lighting, temperature, security, entertainment systems, and more. This can be done through various systems, including smart home hubs, sensors, and devices that communicate with each other.
There are different home automation systems available in the market, such as Z-Wave, Zigbee, and Wi-Fi. These systems use different protocols to communicate with each other and can be controlled through different apps or platforms.
Home automation has become increasingly popular due to its benefits, which include convenience, energy efficiency, increased security, and more control over the home environment. It can also improve the quality of life for people with disabilities or mobility issues.
Advantages of Home Automation using Arduino
Arduino is a popular microcontroller that is widely used in DIY and hobbyist projects. It is also a great platform for home automation due to its flexibility and affordability.
Some of the advantages of using Arduino for home automation include:
Flexibility: Arduino can be programmed to work with various sensors and devices, making it easy to customize and expand home automation systems.
Affordability: Arduino boards and components are relatively inexpensive, making it a cost-effective option for DIY enthusiasts.
Open-source: Arduino is an open-source platform, which means that users can access and modify the source code for their projects.
Compatibility: Arduino can communicate with different home automation systems and protocols, such as Z-Wave and Zigbee.
Community: Arduino has a large and active community of users who share their projects and knowledge, making it easier for beginners to learn and get started.
Getting Started with Arduino Home Automation
If you're new to Arduino and home automation, here are some basic steps to get started:
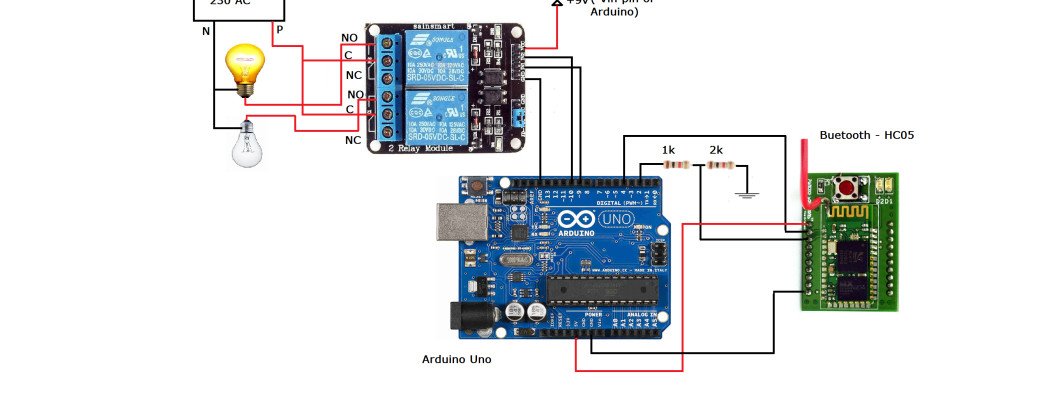
Get an Arduino board: There are different types of Arduino boards available, such as the Arduino Uno, Nano, and Mega. The Arduino Uno is a good choice for beginners.
Choose sensors and devices: Decide on the sensors and devices you want to use for your home automation project. This could include temperature sensors, motion sensors, light sensors, and more.
Get additional components: You'll also need additional components such as resistors, LEDs, and wires.
Program your Arduino: Use the Arduino IDE to write and upload your code to your Arduino board.
Connect sensors and devices: Connect your sensors and devices to your Arduino board using wires and connectors.
Test and troubleshoot: Test your home automation system and troubleshoot any issues you encounter.
Simple Home Automation Projects Using Arduino
Here are some simple home automation projects you can do using Arduino:
Light control: Use a light sensor to control the lighting in your room automatically. The lights turn on when the sensor detects darkness and turn off when it detects light.
Temperature control: Use a temperature sensor to control the temperature in your home. When the temperature rises above a certain level, a fan or air conditioning unit turns on automatically.
Smart doorbell: Use a motion sensor to detect when someone is at your door and trigger a buzzer or send a notification to your phone.
Home security system: Use motion sensors and a camera to monitor your home's security. When motion is detected, the camera takes a picture or video and sends it to your phone.
Automated plant watering: Use a soil moisture sensor to automatically water your plants when the soil becomes too dry.
Conclusion
Home automation using Arduino is a fun and rewarding DIY project that can improve the convenience, comfort, and security of your home. Arduino's flexibility and affordability make it an excellent platform for experimenting with different sensors and devices to automate your home.
By following the steps outlined in this blog post, you can get started with Arduino home automation and create your own simple home automation projects. With a little creativity and experimentation, the possibilities for home automation using Arduino are endless.
Leave a Comment