Build An Arduino Based Solenoid Door Lock Using RFID

Introduction:
The Arduino solenoid door lock using RFID is an innovative project that combines Arduino technology and RFID (Radio Frequency Identification) to create a secure access control system for your doors. In this blog post, we will guide you through the process of building your own electronic door lock using Arduino and RFID technology, providing step-by-step instructions and valuable insights along the way.
Required Components
To build the Arduino solenoid door lock using RFID, you will need the following components:
- Arduino Board: Choose any Arduino board that suits your needs. Arduino Uno or Arduino Mega are popular choices for this project.
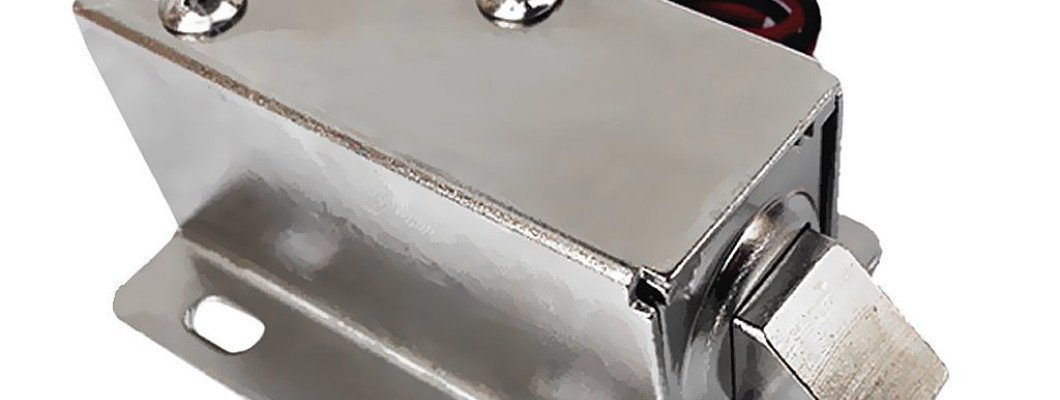
- Solenoid Lock: A solenoid lock is an electromechanical device that can be controlled using electrical signals. It will be used to physically lock and unlock the door.
- RFID Module: An RFID module is used to read the RFID tags or cards for authentication. You can use modules such as RC522 or PN532, which are compatible with Arduino.
- RFID Tags or Cards: These are small devices that store unique identification information. Each authorized person will have their own RFID tag or card for access.
- Jumper Wires: These wires are used to establish connections between the Arduino board, solenoid lock, and RFID module.
- Breadboard or Perfboard: You may require a breadboard or perfboard to create a temporary or permanent circuit arrangement.
Wiring Connections
Now let's connect the components together following these steps:
- Connect the VCC pin of the RFID module to the 3.3V pin on the Arduino board.
- Connect the GND pin of the RFID module to the GND pin on the Arduino board.
- Connect the SDA (Serial Data) pin of the RFID module to the digital pin 10 on the Arduino board.
- Connect the SCK (Serial Clock) pin of the RFID module to the digital pin 13 on the Arduino board.
- Connect the MOSI (Master Out Slave In) pin of the RFID module to the digital pin 11 on the Arduino board.
- Connect the MISO (Master In Slave Out) pin of the RFID module to the digital pin 12 on the Arduino board.
- Connect the RST (Reset) pin of the RFID module to any digital pin on the Arduino board (e.g., digital pin 9).
- Connect one end of the solenoid lock to the 5V pin on the Arduino board.
- Connect the other end of the solenoid lock to a digital pin on the Arduino board (e.g., digital pin 2).
Setting Up the Arduino IDE
To program the Arduino board, you need to set up the Arduino IDE (Integrated Development Environment) and install the required libraries for the RFID module. Follow these steps:
- Download the Arduino IDE from the official Arduino website and install it on your computer.
- Open the Arduino IDE and navigate to "Sketch" > "Include Library" > "Manage Libraries".
- In the Library Manager, search for the RFID library (e.g., "MFRC522") and install it.
- Close the Library Manager and restart the Arduino IDE to ensure the library is properly installed.
Testing and Troubleshooting
Now proceed with testing the Arduino solenoid door lock using RFID,here are some tips for testing and troubleshooting:
- Ensure that the wiring connections are correct and secure.
- Make sure the RFID module is powered properly and the antennas are aligned.
- Verify that the RFID tags or cards are being read correctly by the module.
- Check the serial monitor for any debugging messages or error reports.
- Double-check the code for any syntax errors or logical issues.
If you encounter any issues during testing, refer to the troubleshooting section of the RFID module's documentation and seek help from online forums or communities.
Conclusion
In this blog post, we explored how to build an Arduino solenoid door lock using RFID technology. By combining the power of Arduino and RFID, you can create a secure access control system for your doors. We covered the required components, wiring connections, Arduino IDE setup, programming, and testing procedures. With this knowledge, you can enhance the security of your home or office by implementing this DIY project.
Remember to customize the code and design according to your specific requirements and ensure that all necessary safety measures are followed during the implementation. Enjoy your Arduino solenoid door lock project and explore further possibilities for enhancing your access control system.
3 Comment(s)
This was a fantastic read! The way you presented the facts, coupled with your clear analysis, makes this one of the best articles I’ve come across.
I truly appreciate the depth of thought you put into this article. It offers a well-rounded view that made me think about the topic in a new way.
Brilliantly articulated! Your article seamlessly blends informative content with an engaging narrative. I found it both educational and enjoyable.
Leave a Comment